As soon as we start school we are told to organise our thoughts in a linear style – top to bottom, line by line, left to right. With the advances in neuroscience, we now know that this is like teaching a left hander to write right handed.
You may have been taught to prepare speeches with main points, then sub-points, and sub sub points and writing them out word for word or short outlines.
Which can be very frustrating as this is not how your brain works. Trying to capture your thoughts as they pop into your head – different ideas, interesting quotations, statistics, funny anecdotes, the inkling of a powerful conclusion – into a linear format wastes time and weakens the potential for a highly successful talk.
Mind Mapping is a simple technique to translate these mental ideas onto paper – quickly, efficiently, creatively and elegantly.
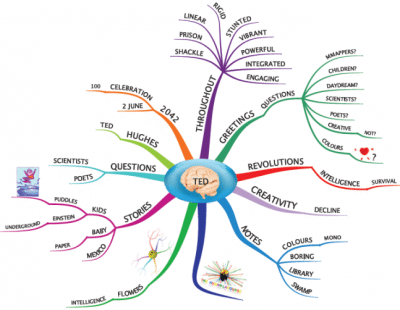 Tony Buzan prepared the following Mind Map to design and present his TEDx talk in December 2012. Watch his amazing and powerful speech while following the Mind Map http://bit.ly/TtlJQE
Of course, Mind Mapping has more applications than just writing speeches. Use it for planning each week; summarizing books, taking notes at seminars etc. it’s a simple, powerful tool. Try it with paper or software (such as IMindMap) – it works!
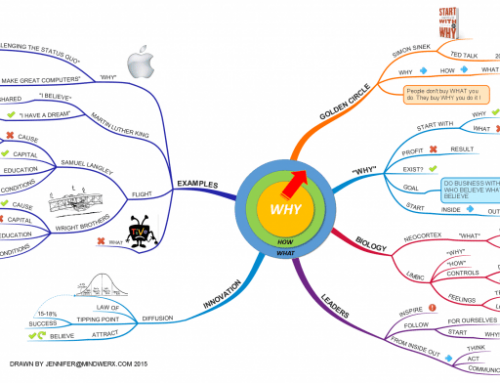
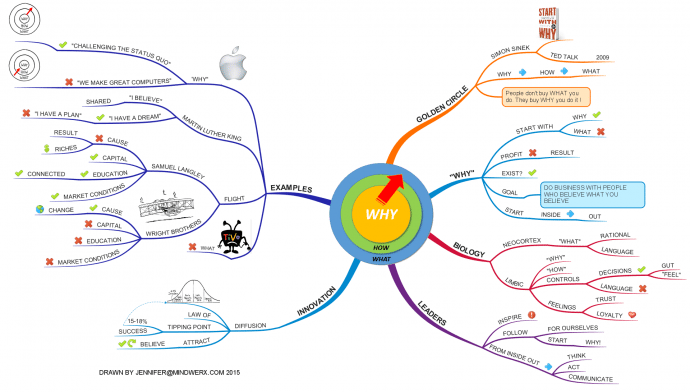
A Mind Map is a powerful graphic technique that provides a universal key to unlocking the potential of the brain. It harnesses the full range of cortical skills – word, image, number, logic, rhythm, colour and spatial awareness – in a single, uniquely powerful manner. In so doing, it gives you the freedom to roam the infinite expanses of your brain.
The Mind Map can be applied to every aspect of life where improved learning and clearer thinking will enhance human performance.
Originated in the late 1960’s by Tony, Mind Maps have now been adopted by millions of people around the world – from the ages of 5 to 105 – whenever they wish to maximize the efficient use of their brainpower.
1. Start to draw in the centre of a blank, unlined page of paper, with an image of the desired topic, using at least three colours.
2. Use images, symbols, codes and dimension throughout your Mind Map.
3. Select key words and print – using capital letters.
4. Each word/image must stand alone, on its own line.
5. The lines must be connected, starting from the central image. In the centre, the lines are thicker, organic and flowing, becoming thinner as they radiate outwards.
6. Make the lines the same length as the word/image.
7. Use colours – as your own code – throughout the Mind Map.
8. Develop your own personal style of Mind Mapping.
9. Use emphasis and show associations between different related topics in your Mind Map.
10. Keep the Mind Map clear by using numerical order or outlines to surround your branches.
1. Place a large white sheet of paper horizontally, or use a Mind Map pad.
2. Gather a selection of coloured pens, ranging from thin nib to highlighter.
3. Select the topic, problem or subject to be Mind Mapped. This will be the basis of your central image.
4. Gather any materials, research or additional information that is needed, so that you have all the facts at your fingertips. Now start to draw in the centre of your page.
5. Start in the centre with an unframed image – approximately 1½ inches (3cm) high and wide for A4 and 4 inches (10 cm) for A3.
6. Use dimension, expression and at least three colours in the central image in order to attract attention and aid memory.
7. Make the branches closest to the centre thick, attached to the image, and ‘wavy’ (organic). Place the Basic Ordering Ideas (BOIs) or chapter headings on those branches.
8. Branch thinner lines off the end of the appropriate BOI in order to hold supporting data.
9. Use images wherever you find it is possible.
10. The image or word should always sit on a line of the same length.
11. Use different colours as your own special code to show people, places, topics, themes, dates and to make the Mind Map more attractive visually.
12. Capture all your ideas, or those that others have contributed, then edit, reorganise, make more beautiful, elaborate, or clarify as a second and yet further advanced stage of thinking.
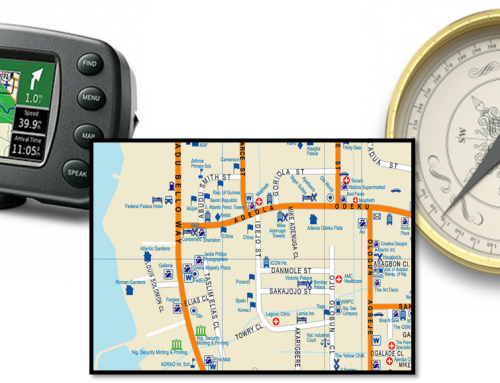
- Give you an overview of a large subject/area.
- Enable you to plan routes/make choices.
- Let you know where you are going, and where you have been.
- Gather and hold large amounts of data.
- Encourage daydreaming and problem-solving by looking for creative pathways.
- Be enjoyable to look at, read, muse over and remember.


Leave A Comment
You must be logged in to post a comment.